- What are Floor Plans?
- What Are Floor Plans Used For?
- DIY Drawing vs. A Scanning App
-
Crafting Your Own Layout: A Step-by-Step Guide to Drawing a Floor Plan
- Step 1: Choose a Starting Point & Observe the Room
- Step 2: Measure Walls, Doors, Windows, and Fixtures Accurately
- Step 3: Establish Your Scale & Sketch the Basic Outline with Symbols
- Step 4: Add Dimension Lines, Labels, and Essential Details
- Step 5: Connect Adjacent Rooms & Finalize Your To-Scale Drawing
- Digital Floor Plan Creators & Apps
- Why Choose an App like CubiCasa for Professional, Automated Results?
What are Floor Plans?
Have you ever looked for a new home and found yourself asking:
- How does the living room compare to the kitchen in size?
- What’s the distance between the main bathroom and the bedrooms?
- Will my furniture actually fit in this new space?
A floor plan is the key to answering all these questions. Think of it as a map of a property, showing you the layout of rooms, walls, doors, and windows at a glance. It’s the single best tool for visualizing a space without having to be there.
When it comes to getting a floor plan, you have two main paths: the modern, digital way or the traditional, DIY way. In this guide, we’ll show you both so you can choose what’s best for you.
What Are Floor Plans Used For?
The purpose of a floor plan depends on your project. If you’re planning a home renovation or designing a new interior layout, a detailed property map is incredibly helpful. It saves time and prevents costly mistakes by letting you visualize everything clearly upfront.
Floor plans are also crucial for real estate listings. With more homebuyers searching online, they demand quick, thorough information—much like online shopping. This rising need for high-quality, scaled layouts has made them vital for real estate marketing. They help buyers quickly grasp a property’s flow and envision themselves living there, making listings far more appealing.
The Easiest Way: Use a Floor Plan App
For most people, especially in real estate, the fastest and most reliable option is a floor plan app. An innovative app like CubiCasa turns your smartphone into a powerful scanning tool, creating a professional and accurate layout for you.Here’s why it’s the go-to choice for so many:
- A scan of an entire property takes just 5-10 minutes making it much faster than creating one manually.
- You don’t need to draw, measure, or know any symbols. Just scan the space, and the app does the rest.
- The technology creates a dimensionally accurate digital floor plan, often including key calculations like Gross Living Area (GLA).
- You receive a clean, easy-to-read floor plan that’s ready for real estate listings, renovation projects, or contractor quotes.
DIY Drawing vs. A Scanning App
Here’s a quick comparison to help you decide:
| Feature | Manual DIY Drawing | Scanning App (like CubiCasa) |
|---|---|---|
| Time Required | Hours to Days | 5-10 Minute Scan |
| Skill Level | Requires patience, careful measurement, and drawing skills. | None needed. Just follow on-screen instructions. |
| Accuracy | Prone to human error; can be difficult to get right. | Highly accurate and consistent, with automated calculations. |
| Tools Needed | Tape measure, pencil, grid paper, eraser, scale ruler. | Just your smartphone. |
| Best For | Hobbyists, initial rough sketches, or learning the basics. | Real estate agents, appraisers, and anyone needing a fast, professional result. |
Crafting Your Own Layout: A Step-by-Step Guide to Drawing a Floor Plan
Are you interested in learning how to draw a floor plan yourself? Do you want to create detailed and precise layouts for your projects? Whether for a personal project or initial planning, sketching a property map can be a rewarding skill. We’ve prepared a comprehensive guide to simplify the process. This guide will help you draft your own drawings using basic, readily available tools.
To begin, you’ll need a few essentials:
- A good quality pencil (an HB for light initial lines and a 2B or fine-tipped pen for final outlines).
- An eraser.
- Paper (we highly recommend grid paper for ease of scaling).
- A reliable measuring tape (a steel retractable one is ideal).
Initially, understanding how to draw a floor plan accurately to scale might seem daunting. However, our detailed instructions and tips will make the process approachable and manageable. For example, for those seeking higher precision, an architect’s scale ruler can be an invaluable aid.

Step 1: Choose a Starting Point & Observe the Room
Begin with a single room. It’s often easiest to start with a large, regularly shaped space like a living room or master bedroom. This provides a good anchor for the rest of your home plan.
Before you even think about measuring, take ample time to observe the room’s overall shape and characteristics. Note the following:
- The number of walls.
- Any non-standard angles (e.g., walls not at 90 degrees to each other).
- Features like recesses, alcoves, columns, or built-in furniture.
- The general placement and type of doors (swinging, sliding, bi-fold) and windows (casement, sash, fixed).
This initial, detailed observation will greatly help in planning your sketch. Indeed, it’s a foundational part of learning how to draw a floor plan effectively.
Step 2: Measure Walls, Doors, Windows, and Fixtures Accurately
Using your tape measure, carefully measure the length of each wall from corner to corner. For maximum accuracy, measure at a consistent height, perhaps waist-high.
Next, record the width and height of every window and door. Crucially, also measure their precise distance from the corners of the room – this positioning is key. Note these dimensions clearly on a rough sketch or a dedicated notepad.
For improved accuracy, especially when measuring longer distances where the tape might sag, ask someone to assist you. Remember to also measure and note the position of any permanent fixtures like fireplaces, kitchen counters, bathroom vanities, or radiators if you plan to include them in your drawing. Consider noting ceiling height if it’s relevant for planning vertical storage or renovations.
Pro Tip: Always measure everything at least twice, preferably three times, to minimize errors. A small measurement mistake can lead to significant inaccuracies in your final dimensionally accurate layout. Diligence here is paramount when figuring out how to draw a floor plan accurately.

Step 3: Establish Your Scale & Sketch the Basic Outline with Symbols
Before you transfer your carefully recorded measurements onto your final drawing paper, you must establish a clear scale. The scale determines the ratio between the measurements on your paper and the actual dimensions of the room.
For residential layouts in North America, a common scale is 1/4 inch on paper representing 1 foot in reality (1/4″ = 1′-0″). In metric systems, 1:50 (1 cm on paper = 0.5 meters in reality) or 1:100 are frequently used. Choose a scale that allows your entire property map to fit comfortably on the paper while still being large enough to show necessary detail. Clearly write your chosen scale on the paper for reference.
Once your scale is set, begin drawing the room’s basic outline (perimeter walls) according to your measurements. Use your pencil lightly at first. Then, sketch in door positions, indicating their swing direction with a quarter-circle arc. Add windows, using standard symbols to differentiate types if necessary (e.g., a single line for a fixed window, double lines for a casement). Remember to represent wall thickness, as this impacts usable space.
Key elements to mark with standard architectural symbols include:
- Walls (differentiate interior and exterior with varying thickness)
- Doors (show swing, type – single, double, sliding)
- Windows (fixed, casement, sash)
- Stairs (indicate direction of ascent/descent)
- Major appliances and sanitary fixtures (sinks, toilets, bathtubs, showers, ovens, refrigerators)

Step 4: Add Dimension Lines, Labels, and Essential Details
Now, it’s time to incorporate dimension lines into your drawing. These are thin, crisp lines running parallel to each wall segment. Write the exact measurement clearly, usually in the middle of the line or just above it. Typically, place dimension lines outside the drawn outline of the room to avoid clutter within the layout itself.
Moreover, clearly indicate all wall lengths, and the precise sizes and positions of doors and windows relative to wall corners or center lines.
Additionally, label each room clearly and legibly (e.g., “Living Room,” “Kitchen,” “Bedroom 1”). Include square footage or area calculations for each room if desired. Remember to re-state the scale used somewhere prominent on your final home plan, often within a title block. Adding a North arrow is also standard practice; it helps orient the viewer. Consequently, this step is crucial for anyone learning how to draw a floor plan that others can easily understand.
Step 5: Connect Adjacent Rooms & Finalize Your To-Scale Drawing
After accurately drawing and dimensioning your first room, move to an adjoining one. Use the connecting walls, doors, or openings from your first room as precise reference points. This ensures everything aligns correctly, which is crucial for the integrity of the overall property map. Subsequently, repeat the measuring, scaling, and drawing process for each subsequent room, carefully connecting them.
Once all rooms and spaces are drafted, conduct a thorough review of your entire home plan. Check for dimensional consistency. For example, do parallel walls have the same overall length when you consider combined rooms? Ensure you include all important features. Erase any unnecessary sketch lines or smudges.
Finally, you can go over your permanent lines with a darker pencil (like a 2B) or a fine-tipped technical pen. This creates a clean, sharp, and professional-looking to-scale drawing. Completing these final touches is a key part of understanding how to draw a floor plan that looks professional.

Digital Floor Plan Creators & Apps
Learning how to draw a floor plan manually can be time-consuming. However, if you need enhanced speed and features, modern technology offers many efficient alternatives. A quick online search reveals a wide array of floor plan software, dedicated floor plan maker tools, and intuitive floor plan designer apps.
These digital solutions often allow users to easily visualize spaces in 2D or 3D. You can experiment with finishes and add furniture from extensive libraries using simple interfaces.
Digital tools range from user-friendly apps for simple homeowner projects (some are free or low-cost) to sophisticated professional CAD software like AutoCAD or Revit for architects. While powerful, professional software typically has a steeper learning curve. Nevertheless, the key benefits of using a digital floor plan creator include:
- Quickly correct mistakes and modify designs.
- Many tools offer 3D conversion for virtual walk-throughs.
- Access pre-drawn furniture, appliances, and fixtures.
- Software can often calculate areas and perimeters.
- Easily share your floor plan digitally.
- Achieve clean, consistent results efficiently.
These applications can be cloud-based for access anywhere, or desktop-installed, depending on your specific needs.
Why Choose an App like CubiCasa for Professional, Automated Results?
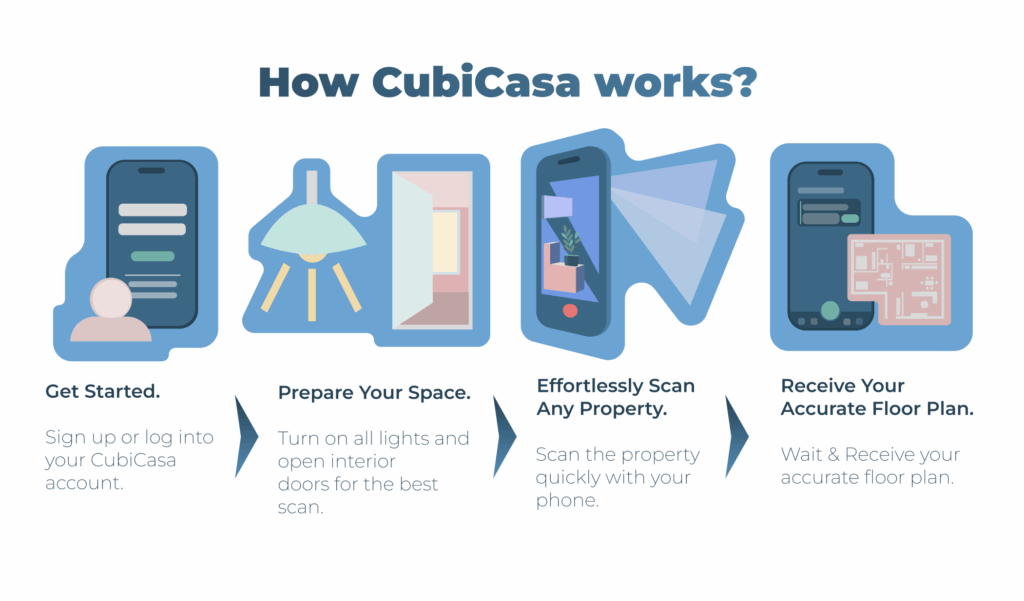
When you need a fast, remarkably accurate, and professional layout without manual drawing or complex software—and want to bypass the learning curve of creating a floor plan from scratch—an innovative scanning app like CubiCasa offers distinct advantages. It uses sophisticated technology, turning your smartphone into a powerful scanning tool.
Here’s why CubiCasa stands out:
- Download the app and follow simple on-screen instructions. A typical property scan takes just 5-10 minutes.
- The app and our service create the property map. You just scan. This makes professional layouts accessible to all.
- Receive a highly accurate, clearly presented proportionate plan in 6-24 hours, ready to print to scale or use digitally, often including GLA calculations.
- Ideal for real estate listings (enhancing virtual tours, aiding staging), renovation quotes, interior design planning, and homeowner records.
- Effortlessly share your floor plan digitally in various formats (PDF, JPG, PNG). CubiCasa simplifies achieving and distributing professional results.

While traditional floor plan creation demands meticulous observation, precise measurements, sketching, detailing, and refining, CubiCasa completely transforms the process. It’s designed for efficiency, eliminating the need for complex software or manual drawing skills. This is how CubiCasa works and how it helps to ease the whole drawing process, turning a complex task into a simple and smooth experience.
In conclusion, take a look at our latest video tutorial: “4 Easy Steps to Create a Floor Plan”.